How To Add Custom Fonts In PicsArt
Adding fonts in PicsArt seems harsh, especially for those seeking to inspire their designs with unique typography. Today, users find many editing apps and software that fit their needs and can select the right colors, shapes, and dimensions.
However, they must learn about fonts to make their design more stunning and modern. We are here to guide you on how to add custom fonts in PicsArt. This article provides a step-by-step guide on how to install custom fonts in PicsArt simply and easily.
Create Custom Fonts For Design Projects
Creativity of design means you are free to describe your thoughts in your way. Today, many software applications available on the market can help you customize your work to your needs. You can discover fonts of the same color, shapes, and dimensions as your choice. But when it comes to fonts, you must have enough knowledge to do it.
Why Is It Important To Use Custom Fonts For Your Design Projects?
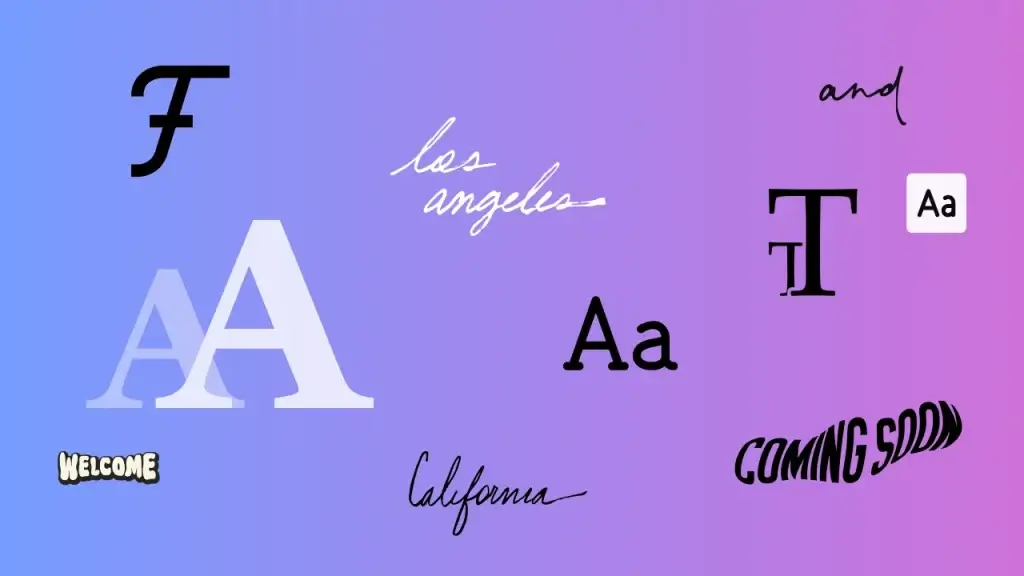
Fonts are a part of our routine life. We often see numerous fonts at different intervals of the day while working in the office, reading, traveling, and even shopping. Some of these remain consistent over time. Because we often see the same font and design for a particular brand. Complex and cursive fonts are challenging to draw. If you like the already-created font, it is ideal to access it in your library. It feels easy and comfortable for the designer to create something similar or closer to their mind. However, it takes a lot of work to find what you already have in your mind ideally.
You can find numerous fonts globally. In most cases, you can see the font you like. Download it and put it in on your design. It is a quick and convenient process. Once you save this font in your library, you can use it for your brand communication.
Learn How to Add Custom Fonts in PicsArt Effortlessly
Below, we will discuss how to add custom fonts in PicsArt project and make your design beautiful by picturing the words.
STEP 1:
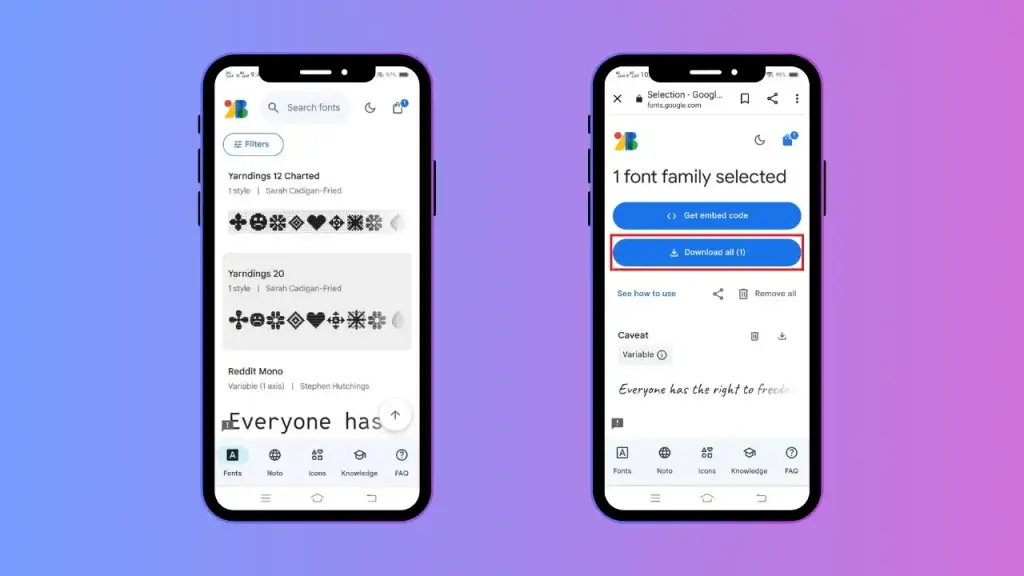
Firstly, find the perfect match font of your choice. It requires serious effort on the internet to find your dreamy font for free, and people can often see it after a bit of searching. Once you find the perfect match of your font, download it, and remember to take a printout before leaving a third-party website. It is strongly recommended that you make sure that the owner has granted permission for anyone to use it for his personal or business purposes or that it allows you to use it in your project design. Seamlessly you can use your mobile for this searching purpose. Furthermore, it is pertinent to mention that Only Fonts in “TTF” format are compatible with the PicsArt mobile App.
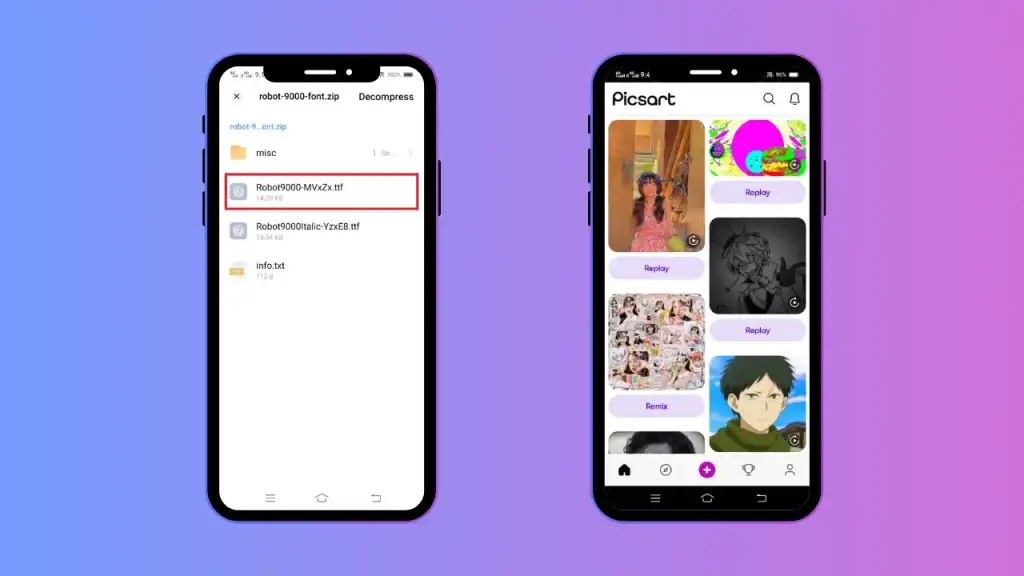
STEP 2:
The next step is to locate the file; usually, on most mobile devices, it is available in the Internet download folder. Click on the file and export it. Launch the Picsart app; your new font is ready to use. If you are using an Operating System, it varies from mobile device tutorial, which will be discussed later.
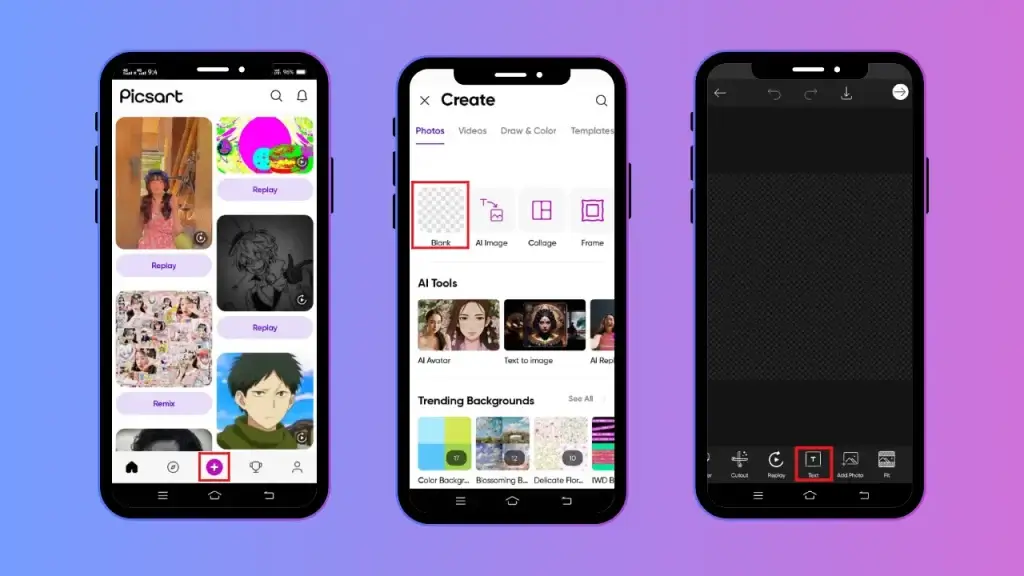
STEP 3:
The next step is to open the PicsArt Mobile app and click on the “+” sign to start a new project, choose a photo from the device gallery, or select it from the background as a project base. Now, choose text from the bottom of the editing menu, and a text box will appear on your screen. Add text of your choice and click on the check mark on the right upper screen to finish the text.
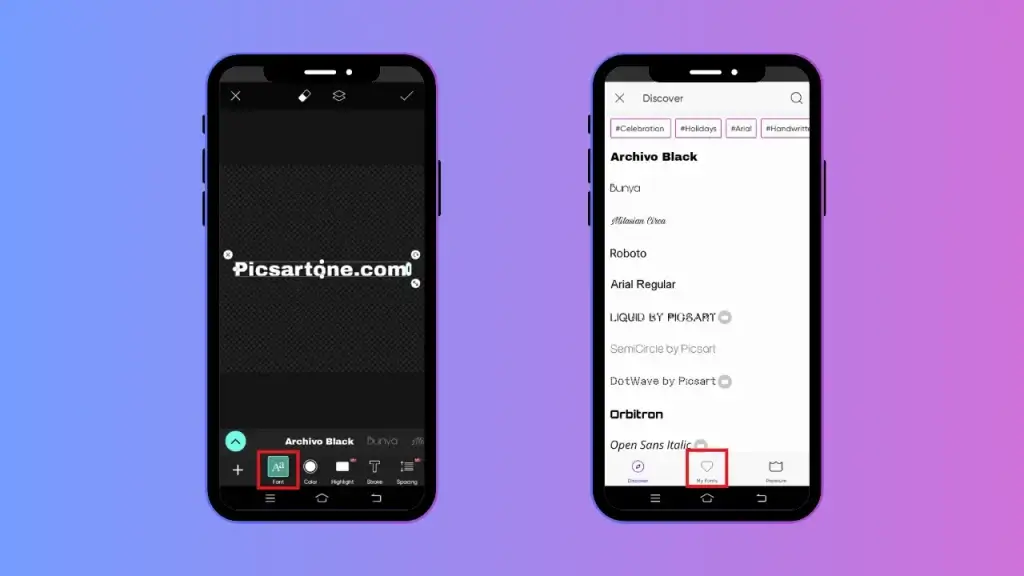
STEP 4:
Next, click on the font icon from the bottom edit menu and then click on the teal arrow. Choose the font from the dropdown menu. Here, at the bottom and heart shape, the icon name “My Fonts” will appear; click on it. You can see the font you downloaded in the “My fonts” list. Now tap to add it to your library.
Yes, you have successfully added a new font to the library. Now, you can use it consistently for your future project.
Now tap back on the editing screen to transform the font to match the newly added font. You can stretch the text box according to your desired size, and change the font color. Also, you can make more changes until you are satisfied. Add other features to your text by using tools like outline, bend, stroke, and highlight. Features like stickers, blur faces, filters & effects can also be added after you have finished font editing.
How to Export or Download The Image
The next step is how to export the image. When you are finally satisfied with the finished shape, you can easily export or download it to your device gallery. For this purpose, click the downward arrow to save your custom font editing picture on your mobile device. You can also directly share the share screen on social media or WhatsApp by tapping the share screen.
Conclusion
Add Custom Fonts in PicsArt through your mobile device is an easy process that allows you not only to add modern fonts but also allows you to stand out. However, it is strongly recommended to use only legal and licensed fonts to avoid any inconvenience in the future. You can understand how to add custom fonts in PicsArt using the guidelines.

David Blake
Author & Creator
